"婚礼邀请函"小程序:宾客信息页面
目录
任务分析
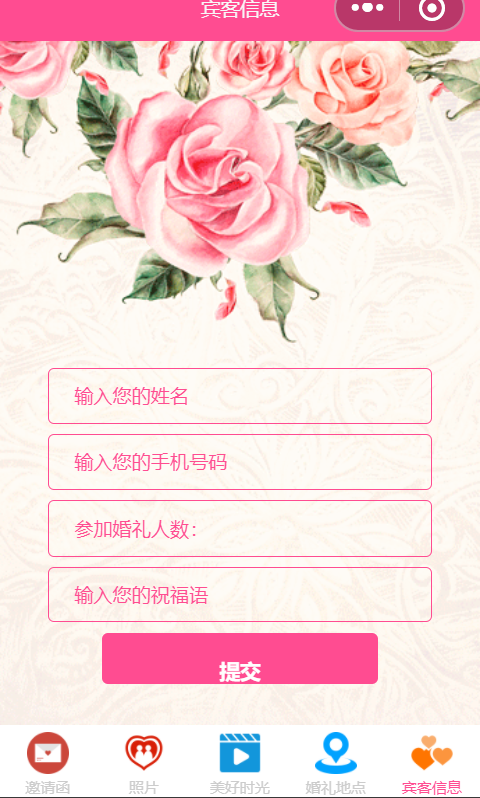
该页面提供了一个表单,
用于填写来宾的信息
前导知识
picker组件
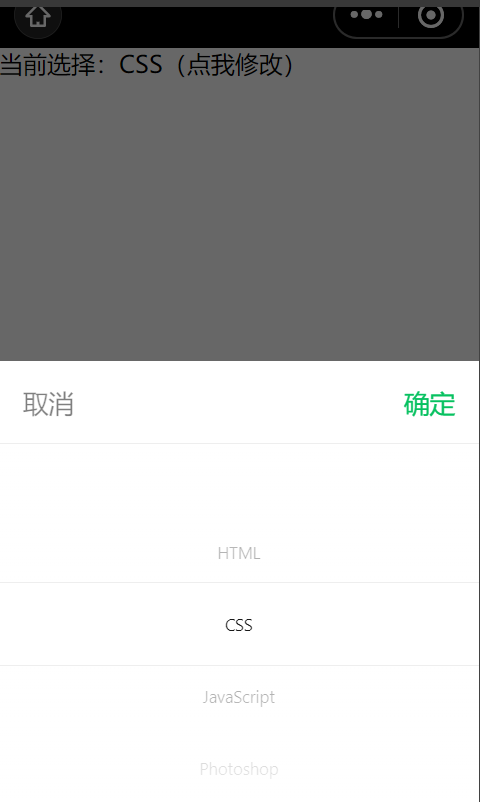
picker组件是从底部弹起的滚动选择器,
目前支持5种选择器,通过mode属性来区分,mode="selector"(普通选择器),
mode="multiSelector"(多列选择器)、时间选择器(mode="time")、日期选择器(mode="date")和省市区选择器(mode="region")
wxml
<picker range="{{array}}" value="{{index}}" bindchange="pickerChange">
  <view>当前选择:{{array[index]}}(点我修改)</view>
</picker>
js
Page({
  data: {
    array: ['HTML', 'CSS', 'JavaScript', 'Photoshop'],
    index: 1
  },
  pickerChange: function (e) {
    console.log('用户选择的值为:', e.detail.value)
    this.setData({ index: e.detail.value })
  }
})
效果
订阅消息
在移动应用开发种,经常需要为用户发送一些消息,
如支付成功提醒等。
订阅消息是在小程序中想用户发送消息的一种方式,
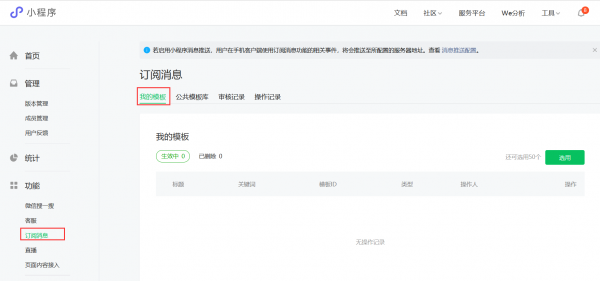
如果要使用订阅消息,需要在”小程序管理后台”中单击左侧菜单栏中的“订阅消息”,
然后点击“添加”按钮添加模板。
然后在模板库中搜索模板,例如“邀请”,即可找到自己想用的模板。
在实际开发中,小程序本身并不具备接收消息的功能,而是由微信中的服务通知功能转达给用户。
编写页面结构和样式
WXML
pages/guest/guest.wxml:
<image class="bg" src="/images/bj_2.png">
</image>
<form bindsubmit="formSubmit">
  <view class="content">
    <view>
      <input name="name" bindblur="nameChange" bindtap="allowSubscribe" placeholder-class="phcolor" placeholder="输入您的姓名" />
    </view>
    <view>
      <input name="phone" bindblur="phoneChange" placeholder-class="phcolor" placeholder="输入您的手机号码" />
    </view>
    <view>
      <picker name="num" bindchange="pickerChange" value="{{picker.index}}" range="{{picker.arr}}">
        参加婚礼人数:{{picker.arr[picker.index]}}</picker>
    </view>
    <view>
      <input name="wish" placeholder-class="phcolor" placeholder="输入您的祝福语" />
    </view>
    <button form-type="submit" >提交</button>
  </view>
</form>
- placeholder属性用于在输入框中显示提示文字
- placeholder-class 属性用于指定提示文字的class样式
WXSS
pages/guest/guest.wxss:
.bg {
  width: 100vw;
  height: 100vh;
}

.content {
  width: 80vw;
  position: fixed;
  left: 10vw;
  bottom: 6vh;
}

.content > view {
  font-size: 2.8vh;
  border: 1rpx solid #ff4c91;
  border-radius: 10rpx;
  padding: 1.5vh 40rpx;
  margin-bottom: 1.5vh;
  color: #ff4c91;
}

.content button {
  font-size: 3vh;
  height: 7.5vh;
  line-height: 7.5vh;
  background: #ff4c91;
  color: #fff;
}

.content picker {
  padding: 0.7vh 0;
}

.content .phcolor {
  color: #ff4c91;
}
JS
  data: {
    picker: {
      arr: ['0', '1', '2', '3', '4', '5', '6'],
      index: 1
    }
  },
  pickerChange: function(e) {
    this.setData({
      'picker.index': e.detail.value
    })
  },
  formSubmit: function(e) {
    var name = e.detail.value.name
    var phone = e.detail.value.phone
    //if (this.checkName(name) && this.checkPhone(phone)) {
      // 在此处可编写代码将e.detail.value提交到服务器
      wx.showToast({title:'提交成功',icon:'succcess',duration:1500})
    //}
  },
效果图
表单验证
WXML
可以通过给input组件绑定blur事件实现表单验证
<view>
      <input name="name" bindblur="nameChange" bindtap="allowSubscribe" placeholder-class="phcolor" placeholder="输入您的姓名" />
    </view>
    <view>
      <input name="phone" bindblur="phoneChange" placeholder-class="phcolor" placeholder="输入您的手机号码" />
    </view>
    <view>
      <picker name="num" bindchange="pickerChange" value="{{picker.index}}" range="{{picker.arr}}">
        参加婚礼人数:{{picker.arr[picker.index]}}</picker>
    </view>
JS
guest/guest.js:
// 验证姓名
  nameChange: function(e) {
    this.checkName(e.detail.value)
  },
  // 验证手机号
  phoneChange: function(e) {
    this.checkPhone(e.detail.value)
  },
  // checkName()方法
  checkName: function(data) {
    var reg = /^[\u4E00-\u9FA5A-Za-z]+$/;
    return this.check(data, reg, '姓名输入错误!')
  },
  // checkPhone()方法
  checkPhone: function(data) {
    var reg = /^(((13)|(15)|(17)|(18))\d{9})$/;
    return this.check(data, reg, '手机号码输入有误!')
  },
  // check()方法
  check: function(data, reg, errMsg) {
    if (!reg.test(data)) {
      wx.showToast({
        title: errMsg,
        icon: 'none',
        duration: 1500
      })
      return false
    }
    return true
  },
- check方法中wx.showToast方法显示提示信息,
在该方法的参数中,title表示文本,icon表示提示图标,duration表示显示多少毫秒后自动消失。
图标的默认值为success,还可以设为loading或 none
formSubmit: function(e) {
    var name = e.detail.value.name
    var phone = e.detail.value.phone
    if (this.checkName(name) && this.checkPhone(phone)) {
      // 在此处可编写代码将e.detail.value提交到服务器
      wx.showToast({title:'提交成功',icon:'succcess',duration:1500})
    }
  },
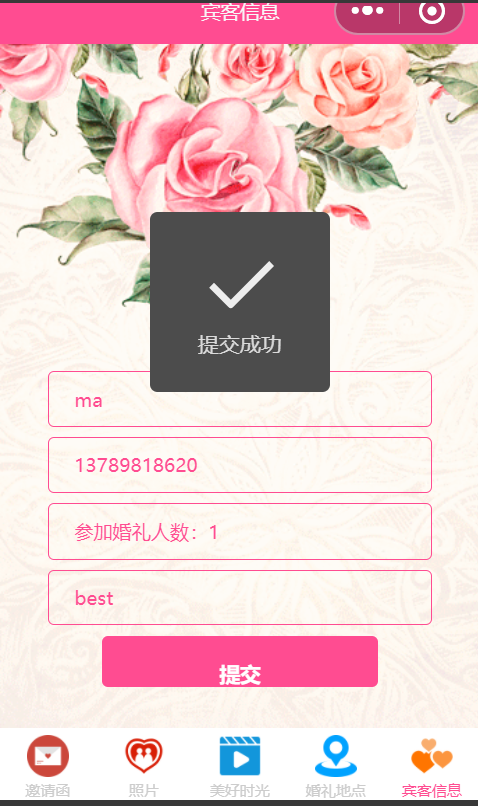
效果:
发送婚礼请帖回复通知
步骤流程
如果服务器收到了表单,就会向用户发送婚礼请帖回复通知,
利用模板消息来实现。
发送模板消息功能涉及3个角色的参与,分别是小程序、服务器和微信接口。
1)用户在小程序中填写表单,提交给服务器,提交时附上formId和code(通过wx.login()获取到的登录凭证
2)服务器收到表单后,使用自己的appid、secret和用户的code请求微信接口,获取用户openid
3)服务器使用appid、secret请求微信接口,获取access_token,然后使用access_token和用户的openid、formId以及模板的id和消息内容请求微信接口,发送模板消息。
4)微信接口将模板消息推送给用户,用户在微信“服务通知”中看到消息。
生成表单ID
下面实现模板消息的发送。为区分每个表单,为表单生成formId
在提交按钮设置report-submit属性,用于生成formId
<button form-type="submit" report-submit>提交</button>
在guest.js中的formSubmit()函数中输出formId
formSubmit: function(e) {
  console.log(e.detail.formId)
  ......
}
客户端发送请求
接下来在pages/guest/guest.js文件中的formSubmit()函数中,
- wx.login()用于获取用户登录凭证(code),在success回调函数中通过res.code获取
- 服务器使用code请求微信接口可以获取用户的openid(用户唯一标识)
- 微信接口在发送模板消息时需要openid才能确定该消息发送给哪一个用户
- 7-10行用于在表单提交后通知服务器向用户发送模板信息,在实际开发中不需要,此处是为了模拟服务器。
编写代码请求服务器:
  formSubmit: function(e) {
    var name = e.detail.value.name
    var phone = e.detail.value.phone
    if (this.checkName(name) && this.checkPhone(phone)) {
      // 在此处可编写代码将e.detail.value提交到服务器
      wx.login({
        success: res => {
          server.post({
            code: res.code
          }, () => {
            // 将表单提交给服务器,传入code
            wx.showToast({
              title: '提交成功',
              icon: 'success',
              duration: 1500
            })
            // 提交成功后,由服务器发送订阅消息
            server.sendTemplateMessage(res => {
              console.log('订阅消息发送结果:', res.data)
            })
          })
        },
      })
    }
  },
  allowSubscribe: function() {
    if (!app.globalData.hasSubscribeMessage) {
      wx.requestSubscribeMessage({
        tmplIds: [tempid], // 在此处填写模板id
        success(res) {
          console.log(res)
          app.globalData.hasSubscribeMessage = res.errMsg.split(':')[1]
        }
      })
    }
  }
模拟服务器
在guest.js Page()对象后面,
写模拟服务器端的代码:
//模拟服务器端代码
var server = {
  appid: appid, // 在此处填写自己的appid
  secret: secret, // 在此处填写自己的secret
  // 用于保存用户的openid
  user: {
    openid: '',formid:''
  },

  // 用于接收表单,调用this.getOpenid()根据code换取openid
  post: function(data, success) {
    console.log('收到客户端提交的数据:', data)
    this.getOpenid(data.code, res => {
      console.log('用户openid:' + res.data.openid)
      this.user.openid = res.data.openid
      success()
    })
  },

  // 用于根据code获取openid
  getOpenid: function(code, success) {
    wx.request({
      url: 'https://api.weixin.qq.com/sns/jscode2session',
      data: {
        appid: this.appid,
        secret: this.secret,
        grant_type: 'authorization_code',
        js_code: code
      },
      success: success
    })
  },

  // 用于发送订阅消息
  sendTemplateMessage: function(success) {
    var user = this.user
    var data = {
      touser: user.openid,
      template_id: tempid,  // 在此处填写模板id
      page: 'index',
      form_id:user.formId,
      data: {
        name1: { value: '王辉辉、张琳琳' },
        phone_number2: { value: '123456789' },
        thing4: { value: '北京市海淀区XX路XX酒店' }
      }
    }
    this.getAccessToken(res => {
      var token = res.data.access_token
      console.log('服务器access_token:' + token)
      var url = 'https://api.weixin.qq.com/cgi-bin/message/subscribe/send?access_token=' + token
      wx.request({
        url: url,
        method: 'post',
        data: data,
        success: success
      })
    })
  },
  // 用于获取access_token
  getAccessToken: function(success) {
    var url = 'https://api.weixin.qq.com/cgi-bin/token?grant_type=client_credential&appid=' + this.appid + '&secret=' + this.secret
    wx.request({
      url: url,
      success: success
    })
  }
}
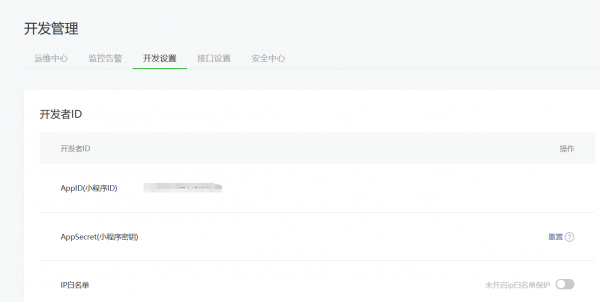
其中小程序的appid 和secret key 可以通过微信公众平台中去查看。
在server对象中编写post()方法和getOpenId方法
备注
获取微信openid等接口必须通过自己的服务器去调用,小程序是不支持像android等app直接调用的,因为 api.weixin.qq.com不能在小程序中配置为域名
因此 最后一个发送订阅消息的 暂时还未成功。
