创建带路由的Vue2项目
来自CloudWiki
目录
背景
Vue项目基本上是单页面应用,在不同的组件间跳转需要路由。
准备工作
下载项目
一个麻雀虽小但是五脏俱全的客户端路由器 ,
可以在 Github 上下载:https://github.com/chrisvfritz/vue-2.0-simple-routing-example
下载完后,解压该目录,重命名目录为 vue-demo,vu 并进入该目录,执行以下命令:
# 安装依赖

npm install
目录结构
为方便和之前的项目对接,项目目录改成如下的目录结构:
基本版
components/VLink.vue
<template>
  <a
    v-bind:href="href"
    v-bind:class="{ active: isActive }"
    v-on:click="go"
  >
    <slot></slot>
  </a>
</template>

<script>
  import routes from '../routes'

  export default {
    props: {
      href: {
        type:String,
        required: true
      }
    },
    computed: {
      isActive () {
        return this.href === this.$root.currentRoute
      }
    },
    methods: {
      go (event) {
        event.preventDefault()
        this.$root.currentRoute = this.href
        window.history.pushState(
          null,
          routes[this.href],
          this.href
        )
      }
    }
  }
</script>

<style scoped>
  .active {
    color: cornflowerblue;
  }
</style>
pages/404.vue
<template>
  <main-layout>
    <p>Page not found</p>
  </main-layout>
</template>

<script>
  // import MainLayout from '../layouts/Main.vue'
  import MainLayout from '../App.vue'

  export default {
    components: {
      MainLayout
    }
  }
</script>
pages/About.vue
<template>
  <main-layout>
    <p>About page</p>
  </main-layout>
</template>

<script>
  // import MainLayout from '../layouts/Main.vue'
  import MainLayout from '../App.vue'

  export default {
    components: {
      MainLayout
    }
  }
</script>
pages/Home.vue
<template>
  <main-layout>
    <p>Welcome home</p>
  </main-layout>
</template>

<script>
  // import MainLayout from '../layouts/Main.vue'
  import MainLayout from '../App.vue'

  export default {
    components: {
      MainLayout
    }
  }
</script>
App.vue
<template>
  <div class="container">
    <ul>
      <li>
        <v-link href="/">Home</v-link>
        <v-link href="/about">About</v-link>
      </li>
    </ul>

    <slot></slot>
  </div>
</template>

<script>
  import VLink from './components/VLink.vue'

  export default {
    components: {
      VLink
    }
  }
</script>

<style scoped>
  .container {
    max-width: 602px;
    margin: 0 auto;
    padding: 15px 30px;
    background: #f9f7f5;
  }
</style>
main.js
import Vue from 'vue'
import routes from './routes'

const app = new Vue({
  el: '#app',
  data: {
    currentRoute: window.location.pathname
  },
  computed: {
    ViewComponent () {
      const matchingView = routes[this.currentRoute]
      return matchingView
        ? require('./pages/' + matchingView + '.vue')
        : require('./pages/404.vue')
    }
  },
  render (h) {
    return h(this.ViewComponent)
  }
})

window.addEventListener('popstate', () => {
  app.currentRoute = window.location.pathname
})
routes.js
export default {
  '/': 'Home',
  '/about': 'About'
}
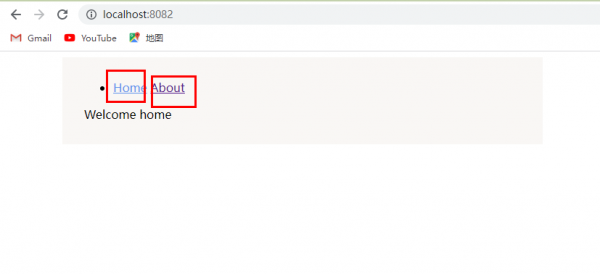
运行结果
改进版
我们现在可以把导航栏单独分离出来,成为一个独立的组件。
App.vue
<template>
  <div class="container">
<!--    <ul>
      <li>
        <v-link href="/">Home</v-link>
        <v-link href="/about">About</v-link>
      </li>

    </ul> -->
    <Nav></Nav>
    <slot></slot>


  </div>
</template>

<script>

  import Nav from './pages/Nav.vue'
  export default {
    components: {
	  Nav
    }
  }
</script>

<style scoped>
  .container {
    max-width: 602px;
    margin: 0 auto;
    padding: 15px 30px;
    background: #f9f7f5;
  }
</style>
<template>
	<ul>
	      <li>
	        <v-link href="/">Home</v-link>
	        <v-link href="/about">About</v-link>
	      </li>

	    </ul>
</template>

<script>

  import VLink from '../components/VLink.vue'
  export default {
    components: {
      VLink,
    }
  }

</script>

<style>
</style>
运行结果
运行效果同前:
