小程序:数据绑定
目录
Mustache语法
Mustache 是一款「logic-less(轻逻辑)」的前端模板引擎,它原本是基于 javascript 实现的,但是因为轻量易用,所以经过拓展目前支持更多的平台,如 java,.NET,PHP,C++ 等。Mustache 主要用于在表现和数据相分离的前端技术架构中,根据数据生成特定的动态内容,这些内容在网页中指的是HTML结构,而在小程序中则是WXML结构。
项目主页:http://mustache.github.io/
小程序中的 Mustache
其实微信在小程序里只实现了 Mustache 的一小部份功能,也就是我们前面课程中所提及的几种数据绑定方法,基本上只要掌握模板:双括号包装变量或简单表达式,就可以完成WXML开发了。但除了小程序中的能力之外,Mustache 还有更多功能。
原文链接:https://blog.csdn.net/weiwenjuan0923/article/details/85039374
逻辑层:
不加{{ }} 是纯文本,
{{ }}中的内容为动态数据,
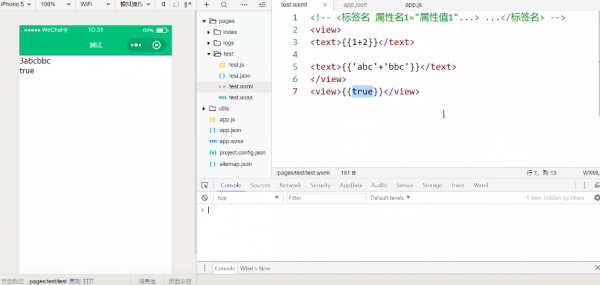
可以进行数字的相加、字符串的相加。
若内容为数字与字符串相加,则会默认数字为字符串格式。
<view>
    <view>{{1+2}}</view>
    <view>{{"hello"+"world"}}</view>
    <view>{{1+"hello"}}</view>
</view>
WXML数据绑定
在WXML中引用数据
举例
index.js;
data: {
      time:"2022/03/21",
      name:"马欣",
      age:"39",
      city:["济南","青岛],
      score:{
          math:90,
          chinese:96,
      }

  },
index.wxml:
<view>2022/03/21</view>
<view>{{time}}</view>
<view>{{name}}</view>
<view>{{age}}</view>
<view>{{city[0]}}</view>
<view>{{score.math}}
在WXML中引用复合数据,前面不用带content:
<text class="post-like-font">{{dataNum.collection}}</text>
改变数据的值
setData()将数据从逻辑层发送到视图层,同时改变对应的 this.data 的值。
注意:
1.直接修改 this.data 无效,无法改变页面的状态,还会造成数据不一致。
2.单次设置的数据不能超过1024kB,请尽量避免一次设置过多的数据。
不能通过this.data = {text : “hello”}这样来改变
viewTap: function() {

  this.setData({
       name:"teacher",
       num:100,
       'city[0]':'qingdao',
       'score.math':'99.5'

      })
},
案例2
代码举例:
onLoad: function (options) {
      console.log("onload")
      var content = {
          ...
          dataNum:{
              reading:103,
              collection:93,
          },
          ...
      }
      this.setData(content)
      console.log(content.dataNum.collection,content.dataNum.reading)

  },
数据绑定案例
视图层、逻辑层:
WXML 通过 {{变量名}} 来绑定 WXML 文件和对应的 JavaScript 文件中的 data 对象属性。
test,js:
// pages/test/test.js
Page({

  /**
   * 页面的初始数据
   */
  data: {
       data1:1+2,
       data2:"hello"+ " world",
       data3:1+"hello",
  },
wxml中的动态数据均来自对应page的data,数据绑定使用 Mustache 语法(双大括号)将变量包起来:
test.wxml:
<view>
    <view>{{data1}}</view>
    <view>{{data2}}</view>
    <view>{{data3}}</view>
</view>
示例代码1:成绩表单
成绩表单:
js
  data: {
      name:'张三',
      chinese:95,
      math:90,
      computer:96,
      comment:'该同学表现得很棒,继续努力!'
  },
  show:function(options){
    console.log(this.data.name)
    console.log(this.data.chinese)
    console.log(this.data.math)
    console.log(this.data.computer)
    console.log(this.data.comment)
  },
WXML
<!--pages/test/index.wxml-->
<view class="container">
  <form bindsubmit="submit">
    <view>
      <text>姓名:</text>
      <input name="name" model:value="{{name}}" bindtap="show"/>
    </view>
    <view>
      <text>性别:</text>
      <radio-group name="gender">
        <label><radio value="0" checked="{{checked}}" />男</label>
        <label><radio value="1" />女</label>
      </radio-group>
    </view>
    <view>
      <text>语文:</text>
      <input name="chinese"   value="{{chinese}}" />
    </view>
    <view>
      <text>数学:</text>
      <input name="math"  value="{{math}}" bindtap="change"/>
    </view>
    <view>
    <text>小程序:</text>
      <input name="computer"  valuer="{{computer}}" bindtap="change"/>
    </view>
    <view>
      <text>老师评语:</text>
      <textarea name="opinion" value="{{comment}}" />
    </view>
    <button form-type="submit">提交</button>
  </form>
</view>
WXSS
/* pages/test/index.wxss */
.container {
  margin: 50rpx;
}

view {
  margin-bottom: 30rpx;
}

input {
  width: 600rpx;
  margin-top: 10rpx;
  border-bottom: 2rpx solid #ccc;
}

label {
  display: block;
  margin: 8rpx;
}

textarea {
  width: 600rpx;
  height: 150rpx;
  margin-top: 20rpx;
  border: 2rpx solid #eee;
}
示例代码2:轮播图
<view>2022/03/21</view>
<view>{{time}}</view>
<!--  -->

<swiper class="content-info-slide" indicator-dots="true" autoplay="true" interval="2000">
  <swiper-item>
    <image src='{{img_src[0]}}'
      mode="widthFix"></image>
   </swiper-item>
   <swiper-item>
    <image src='{{img_src[1]}}'
      mode="widthFix"></image>
   </swiper-item>
   <swiper-item>
    <image src='{{img_src[2]}}'
      mode="widthFix"></image>
  </swiper-item>

</swiper>
双向数据绑定
视图层、逻辑层:
在 WXML 中,普通的属性的绑定是单向的。例如:
<input value="{{value}}" />
如果使用 this.setData({ value: 'leaf' }) 来更新 value ,this.data.value 和输入框的中显示的值都会被更新为 leaf ;但如果用户修改了输入框里的值,却不会同时改变 this.data.value 。
如果需要在用户输入的同时改变 this.data.value ,需要借助简易双向绑定机制。此时,可以在对应项目之前加入 model: 前缀:
<input model:value="{{value}}" />
这样,如果输入框的值被改变了, this.data.value 也会同时改变。同时, WXML 中所有绑定了 value 的位置也会被一同更新, 数据监听器 也会被正常触发。
示例:成绩表单2
WXML
<!--pages/test/index.wxml-->
<view class="container">
  <form bindsubmit="submit">
    <view>
      <text>姓名:</text>
      <input name="name" model:value="{{name}}" bindtap="show"/>
    </view>
    <view>
      <text>性别:</text>
      <radio-group name="gender">
        <label><radio value="0" checked="{{checked}}" />男</label>
        <label><radio value="1" />女</label>
      </radio-group>
    </view>
    <view>
      <text>语文:</text>
      <input name="chinese"   model:value="{{chinese}}" />
    </view>
    <view>
      <text>数学:</text>
      <input name="math"  model:value="{{math}}" bindtap="show"/>
    </view>
    <view>
    <text>小程序:</text>
      <input name="computer"  model:value="{{computer}}" bindtap="show"/>
    </view>
    <view>
      <text>老师评语:</text>
      <textarea name="opinion" model:value="{{comment}}" />
    </view>
    <button form-type="submit">提交</button>
  </form>
</view>
WXSS
/* pages/test/index.wxss */
.container {
  margin: 50rpx;
}

view {
  margin-bottom: 30rpx;
}

input {
  width: 600rpx;
  margin-top: 10rpx;
  border-bottom: 2rpx solid #ccc;
}

label {
  display: block;
  margin: 8rpx;
}

textarea {
  width: 600rpx;
  height: 150rpx;
  margin-top: 20rpx;
  border: 2rpx solid #eee;
}
js
  data: {
      name:'张三',
      chinese:95,
      math:90,
      computer:96,
      comment:'该同学表现得很棒,继续努力!'
  },
  show:function(options){
    console.log(this.data.name)
    console.log(this.data.chinese)
    console.log(this.data.math)
    console.log(this.data.computer)
    console.log(this.data.comment)
  },
用于双向绑定的表达式有如下限制:
1.只能是一个单一字段的绑定,如
<input model:value="值为 {{value}}" />
<input model:value="{{ a + b }}" />
都是非法的;
2.目前,尚不能 data 路径,如
<input model:value="{{ a.b }}" />
这样的表达式目前暂不支持。
原文链接:https://blog.csdn.net/weixin_42554191/article/details/104025054
