Django之使用SQLite数据库
来自CloudWiki
初学者暂时不用理会其中的概念,一步一步照着做即可,出来效果之后再慢慢体会,有问题可以文末留言。
目录
安装和升级django
执行命令,安装扩展库django,如果已安装,尝试升级到最新版
C:\Users\thinkpad\AppData\Local\Programs\Python\Python37\Scripts>pip3 install django
Requirement already satisfied: django in c:\users\thinkpad\appdata\local\programs\python\python37\lib\site-packages
Requirement already satisfied: pytz in c:\users\thinkpad\appdata\local\programs\python\python37\lib\site-packages (from django)
You are using pip version 9.0.1, however version 18.1 is available.
You should consider upgrading via the 'python -m pip install --upgrade pip' command.

C:\Users\thinkpad\AppData\Local\Programs\Python\Python37\Scripts>pip3 install django --upgrade
Requirement already up-to-date: django in c:\users\thinkpad\appdata\local\programs\python\python37\lib\site-packages
Requirement already up-to-date: pytz in c:\users\thinkpad\appdata\local\programs\python\python37\lib\site-packages (from django)
创建项目和应用
执行命令,创建网站项目onLinePythonLearning和一个应用questions
D:\teaching\python\实训>django-admin startproject onLinePythonLearning

D:\teaching\python\实训>cd onLinePythonLearning

D:\teaching\python\实训\onLinePythonLearning>python manage.py startapp questions
配置应用
打开网站项目文件夹中的settings.py文件,配置上面创建的应用
INSTALLED_APPS = [
    'questions2',
    'django.contrib.admin',
    'django.contrib.auth',
    'django.contrib.contenttypes',
    'django.contrib.sessions',
    'django.contrib.messages',
    'django.contrib.staticfiles',
]
创建模型
打开应用questions2文件夹中的models.py文件,增加一个模型
from django.db import models

# Create your models here.

class Question2(models.Model):
    id = models.AutoField(primary_key=True)
    questionContent = models.CharField(max_length=200,unique=True)
    option_a = models.CharField(max_length=50)
    option_b = models.CharField(max_length=50)
    option_c = models.CharField(max_length=50)
    option_d = models.CharField(max_length=50)
    answer = models.CharField(max_length=50)
创建数据表
执行命令,创建数据表
makemigrations会在当前目录下生成一个migrations文件夹,该文件夹的内容就是数据库要执行的内容
D:\teaching\python\实训\onLinePythonLearning>python manage.py makemigrations questions2
Migrations for 'questions2':
  questions2\migrations\0001_initial.py
    - Create model Question2
migrate就是执行之前生成的migrations文件,这一步才是操作数据库的一步
D:\teaching\python\实训\onLinePythonLearning>python manage.py migrate
Operations to perform:
  Apply all migrations: admin, auth, contenttypes, questions2, sessions
Running migrations:
  Applying contenttypes.0001_initial... OK
  Applying auth.0001_initial... OK
...
注册数据表
打开应用questions2的admin.py,注册上面创建的数据表
from django.contrib import admin

# Register your models here.
from .models import Question2
admin.site.register(Question2)
创建超级用户
执行命令,创建超级用户
D:\teaching\python\实训\onLinePythonLearning>python manage.py createsuperuser
Username (leave blank to use 'thinkpad'): admin
Email address: maxin@qq.com
Password:000000
Password (again):000000
This password is too short. It must contain at least 8 characters.
This password is too common.
This password is entirely numeric.
Bypass password validation and create user anyway? [y/N]: y
Superuser created successfully.
启动网站
执行命令,启动网站
D:\teaching\python\实训\onLinePythonLearning>python manage.py runserver
Performing system checks...

System check identified no issues (0 silenced).
January 27, 2019 - 09:21:57
Django version 2.1.5, using settings 'onLinePythonLearning.settings'
Starting development server at http://127.0.0.1:8000/
Quit the server with CTRL-BREAK.
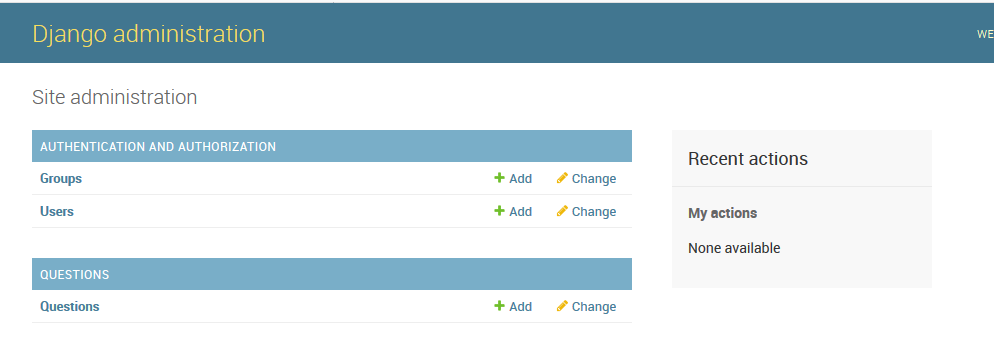
登陆管理账号
打开浏览器,输入网址http://127.0.0.1:8000/admin/,输入用户名和密码,登录
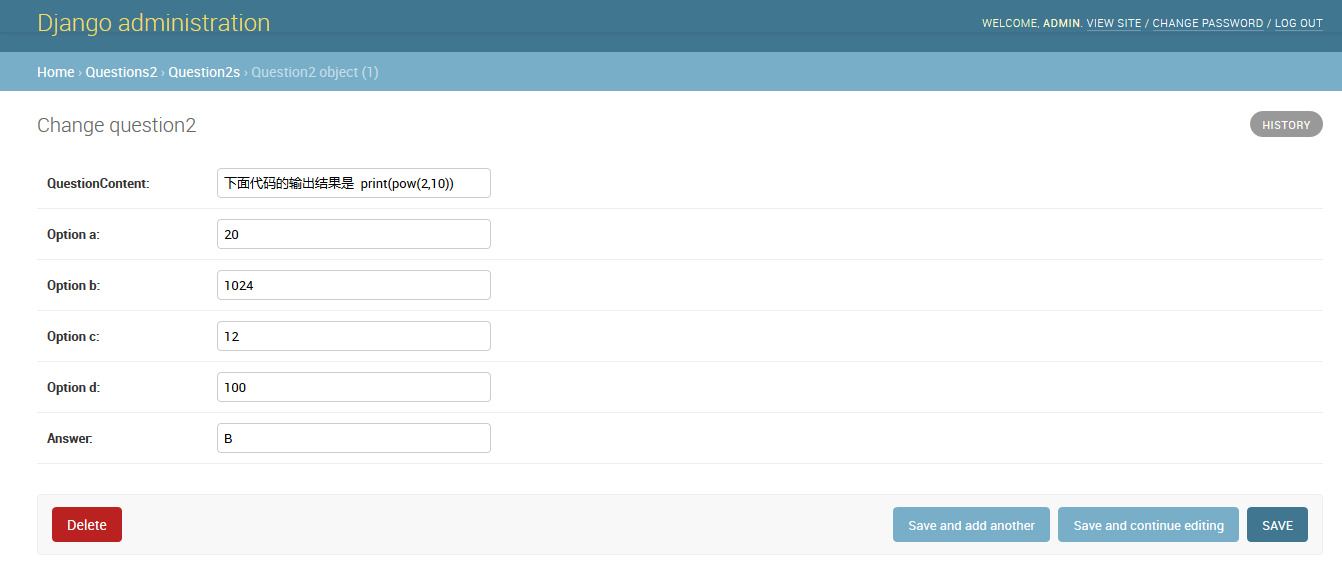
增加记录
单击question后面的Add,增加几条记录
创建视图
打开应用questions2的views.py文件,创建视图
from django.shortcuts import render
from django.http import HttpResponse
from .models import Question2

# Create your views here.
def index(request):
    htmlCode ='<table border="1px">'
    for row in Question2.objects.all():
        htmlCode +=('<tr><td>'+str(row.id)+'</td><td>'+
                    row.questionContent+'</td><td>A. '+
                    row.option_a+'</td><td>B. '+
                    row.option_b+'</td><td>C. '+
                    row.option_c+'</td><td>D. '+
                    row.option_d+'</td>')
    htmlCode +='</table>'
    return HttpResponse(htmlCode)
配置路由
在应用questions2中新建urls.py文件,配置路由
from django.urls import path
from . import views

urlpatterns = [
        path('',views.index),
        ]
打开网站项目的urls.py文件,配置路由:
from django.contrib import admin
from django.urls import path,include

urlpatterns = [
    path('admin/', admin.site.urls),
    path('check/', include('questions2.urls'))
]
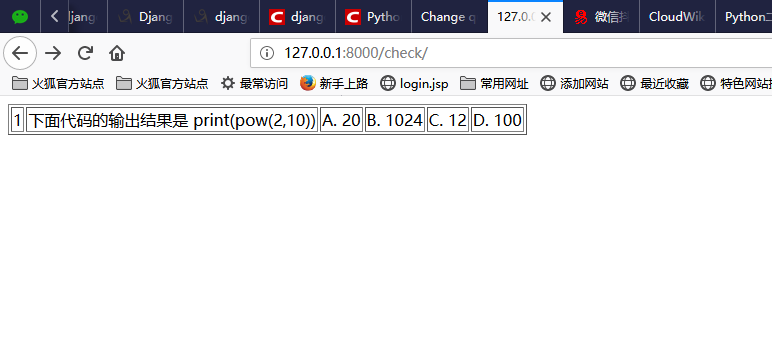
登陆网站,查看数据
在浏览器中输入网址http://127.0.0.1:8000/check/,查看数据库中的数据


