TensorFlow:概念和语法
参考文档:https://blog.csdn.net/davincil/article/details/75304298
https://cloud.tencent.com/developer/article/1007179
目录
关于 TensorFlow
TensorFlow 是一个采用数据流图(data flow graphs),用于数值计算的开源软件库。
节点(Nodes)在图中表示数学操作,图中的线(edges)则表示在节点间相互联系的多维数据数组,即张量(tensor)。它灵活的架构让你可以在多种平台上展开计算,例如台式计算机中的一个或多个CPU(或GPU),服务器,移动设备等等。
TensorFlow 最初由Google大脑小组(隶属于Google机器智能研究机构)的研究员和工程师们开发出来,用于机器学习和深度神经网络方面的研究,但这个系统的通用性使其也可广泛用于其他计算领域。
参考文档:https://www.cnblogs.com/wkslearner/archive/2018/01/03/8185890.html
TensowFlow要点
- 使用图 (graph) 来表示计算任务.
- 在被称之为 会话 (Session) 的上下文 (context) 中执行图.
- 使用 张量(tensor) 表示数据.
- 通过 变量 (Variable) 维护状态.
- 使用 feed 和 fetch 可以为任意的操作(arbitrary operation) 赋值或者从其中获取数据。
数据流图Graph
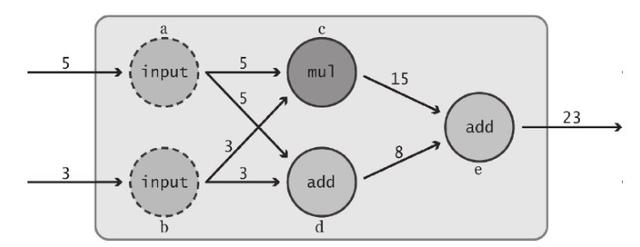
数据流图用“结点”(nodes)和“线”(edges)的有向图来描述数学计算。
“节点” 一般用来表示施加的数学操作,但也可以表示数据输入(feed in)的起点/输出(push out)的终点,或者是读取/写入持久变量(persistent variable)的终点。
“线”表示“节点”之间的输入/输出关系。这些数据“线”可以输运“size可动态调整”的多维数据数组(后面我们将会讲到,这种多维数据数组其实叫做“张量”(tensor))。
张量从图中流过的直观图像是这个工具取名为“Tensorflow”的原因。一旦输入端的所有张量准备好,节点将被分配到各种计算设备完成异步并行地执行运算。
会话Session
Session用来执行构造好的计算图,同时会话拥有和管理程序运行时的所有资源。
当计算完成之后,需要通过关闭会话来帮助系统回收资源。
下面这个小程序定义了一个图,并创建了一个Session去执行这个图:
# 创建2个矩阵,前者1行2列,后者2行1列,然后矩阵相乘:
matrix1 = tf.constant([[3,3]])
matrix2 = tf.constant([[2], [2]])
product = tf.matmul(matrix1,matrix2)

# 上边的操作是定义图,然后用会话Session去计算:
with tf.Session() as sess:
    result2 = sess.run(product)
    print(result2)
常量 constant
功能说明
constant是TensorFlow的常量节点,通过constant方法创建,其是计算图(Computational Graph)中的起始节点,是传入数据。
参数列表
参数名 	必选 	类型 	说明
value 	是 	常量数值或者 list 	输出张量的值
dtype 	否 	dtype 	输出张量元素类型
shape 	否 	1 维整形张量或 array 	输出张量的维度
name 	否 	string 	张量名称
verify_shape 	否 	Boolean 	检测 shape 是否和 value 的 shape 一致,若为 Fasle,不一致时,会用最后一个元素将 shape 补全
constant(
    value,
    dtype=None,
    shape=None,
    name='Const',
    verify_shape=False
)
示例代码
示例代码1:
import tensorflow as tf
# 创建两个常量节点
node1 = tf.constant(3.2)
node2 = tf.constant(4.8)
# 创建一个 adder 节点,对上面两个节点执行 + 操作
adder = node1 + node2
# 打印一下 adder 节点
print(adder)
# 打印 adder 运行后的结果
sess = tf.Session()
print(sess.run(adder))
示例代码2:
#!/usr/bin/python

import tensorflow as tf
import numpy as np
a = tf.constant([1,2,3,4,5,6],shape=[2,3])
b = tf.constant(-1,shape=[3,2])
c = tf.matmul(a,b)#创建了第一张图,a和b相乘

e = tf.constant(np.arange(1,13,dtype=np.int32),shape=[2,2,3])
f = tf.constant(np.arange(13,25,dtype=np.int32),shape=[2,3,2])
g = tf.matmul(e,f)#创建了第二张图,e和f相乘

#通过对话去执行图
with tf.Session() as sess:
    print (sess.run(a))
    print ("##################################")
    print (sess.run(b))
    print ("##################################")
    print (sess.run(c))
    print ("##################################")
    print (sess.run(e))
    print ("##################################")
    print (sess.run(f))
    print ("##################################")
    print (sess.run(g))
然后执行:
python /home/ubuntu/constant.py
执行结果:
a: 2x3 维张量;
b: 3x2 维张量;
c: 2x2 维张量;
e: 2x2x3 维张量;
f: 2x3x2 维张量;
g: 2x2x2 维张量。
占位符placeholder
功能说明
上面使用tf.constant()创建的 Tensor 都是常量,一旦创建后其中的值就不能改变了。有时我们还会需要从外部输入数据,这时可以用tf.placeholder 创建占位 Tensor,占位 Tensor 的值可以在运行的时候输入。如下就是创建占位 Tensor 的例子:
创建方式
X = tf.placeholder(dtype=tf.float32, shape=[144, 10], name='X')
参数列表
参数名 	必选 	类型 	说明
dtype 	是 	dtype 	占位符数据类型
shape 	否 	1 维整形张量或 array 	占位符维度
name 	否 	string 	占位符名称
placeholder(
    dtype,
    shape=None,
    name=None
)
示例代码
示例代码1:
import tensorflow as tf
# 创建两个占位 Tensor 节点
a = tf.placeholder(tf.float32)
b = tf.placeholder(tf.float32)
# 创建一个 adder 节点,对上面两个节点执行 + 操作
adder_node = a + b
# 打印三个节点
print(a)
print(b)
print(adder)
# 运行一下,后面的 dict 参数是为占位 Tensor 提供输入数据
sess = tf.Session()
print(sess.run(adder, {a: 3, b: 4.5}))
print(sess.run(adder, {a: [1, 3], b: [2, 4]}))
示例代码2:/home/ubuntu/placeholder.py
#!/usr/bin/python

import tensorflow as tf
import numpy as np

x = tf.placeholder(tf.float32,[None,3])
y = tf.matmul(x,x)
with tf.Session() as sess:
    rand_array = np.random.rand(3,3)
    print(sess.run(y,feed_dict={x:rand_array}))
然后执行:
python /home/ubuntu/placeholder.py
执行结果:
输出一个 3x3 的张量
参考文档:https://blog.csdn.net/geyunfei_/article/details/78782804
变量variable
功能说明
TensorFlow 中最基本的单位是常量(Constant)、变量(Variable)和占位符(Placeholder)。常量定义后值和维度不可变,变量定义后值可变而维度不可变。在神经网络中,变量一般可作为储存权重和其他信息的矩阵,而常量可作为储存超参数或其他结构信息的变量。
一个Variable代表一个可修改的张量,存在在TensorFlow的用于描述交互性操作的图中。它们可以用于计算输入值,也可以在计算中被修改。对于各种机器学习应用,一般都会有模型参数,可以用Variable表示。
d = tf.Variable(2, tf.int16)
e = tf.Variable(4, tf.float32)
f = tf.Variable(8, tf.float32)
k = tf.Variable(tf.zeros([2,2], tf.float32))
l = tf.Variable(tf.zeros([5,6,5], tf.float32))
我们赋予tf.Variable不同的初值来创建不同的Variable:
参数列表
参数名 	类型 	说明
initial_value 	张量 	Variable 类的初始值,这个变量必须指定 shape 信息,否则后面 validate_shape 需设为 False
trainable 	Boolean 	是否把变量添加到 collection GraphKeys.TRAINABLE_VARIABLES 中(collection 是一种全局存储,不受变量名生存空间影响,一处保存,到处可取)
collections 	Graph collections 	全局存储,默认是 GraphKeys.GLOBAL_VARIABLES
validate_shape 	Boolean 	是否允许被未知维度的 initial_value 初始化
caching_device 	string 	指明哪个 device 用来缓存变量
name 	string 	变量名
dtype 	dtype 	如果被设置,初始化的值就会按照这个类型初始化
expected_shape 	TensorShape 	要是设置了,那么初始的值会是这种维度
__init__(
    initial_value=None,
    trainable=True,
    collections=None,
    validate_shape=True,
    caching_device=None,
    name=None,
    variable_def=None,
    dtype=None,
    expected_shape=None,
    import_scope=None
)
示例代码
示例代码1:
我们可以应用变量来定义神经网络中的权重矩阵和偏置项向量:
weights = tf.Variable(tf.truncated_normal([256 * 256, 10]))
    biases = tf.Variable(tf.zeros([10]))
    print(weights.get_shape().as_list())
    print(biases.get_shape().as_list())
    #输出
    >>>[65536, 10]
    >>>[10]
示例代码2:/home/ubuntu/Variable.py
#!/usr/bin/python

import tensorflow as tf
initial = tf.truncated_normal(shape=[10,10],mean=0,stddev=1)
W=tf.Variable(initial)
list = [[1.,1.],[2.,2.]]
X = tf.Variable(list,dtype=tf.float32)
init_op = tf.global_variables_initializer()
with tf.Session() as sess:
    sess.run(init_op)
    print ("##################(1)################")
    print (sess.run(W))
    print ("##################(2)################")
    print (sess.run(W[:2,:2]))
    op = W[:2,:2].assign(22.*tf.ones((2,2)))
    print ("###################(3)###############")
    print (sess.run(op))
    print ("###################(4)###############")
    print (W.eval(sess)) #computes and returns the value of this variable
    print ("####################(5)##############")
    print (W.eval())  #Usage with the default session
    print ("#####################(6)#############")
    print (W.dtype)
    print (sess.run(W.initial_value))
    print (sess.run(W.op))
    print (W.shape)
    print ("###################(7)###############")
    print (sess.run(X))
然后执行:
python /home/ubuntu/Variable.py
参考文档:https://blog.csdn.net/m0_37324740/article/details/77803590
