Django之用户登录与登陆验证
来自CloudWiki
技术要点
1)实现用户登录,登录后跳转到指定页面
2)限定一个页面必须登录才能访问,否则自动跳转到登录页面
具体步骤
创建网页模板
首先,按照Django之使用SQLite数据库描述的步骤创建网站。
1、在网站项目文件夹中创建子文件夹templates,在其中创建文件login.html。
<html>
<head>
<meta charset="utf-8" />
<style type="text/css">
#layer2{width:400px; height:auto; padding:30px; margin:30px auto 0; background:#ddf; border-radius:8px;}
h3{font-size:16pt; color:#a00; text-align:center;}
#login
  {
  width:70%;margin:0 auto;

  }

#login td
  {

    height:40px;

  }
#login .col1{ width:35%;text-align:center;  }
#login .col2{ text-align:center; }
#login .col3{ text-align:center; }
</style>
</head>
<body><div id="layer2">
<form  method="POST" action="/check/login/"><!-- 单击登陆按钮之后执行的操作 -->
{% csrf_token %} <!-- django自带的防跨站引用攻击功能 -->
<table id="login">
<h3>用户登陆界面</h3>
<tr>
<td class="col1">用户名</td>
<td class="col2"><input type="text" name="usr"/></td>
</tr>

<tr>
<td class="col1">密码</td>
<td class="col2"><input type="password" name="pwd" /></td>
</tr>

<tr>
<td colspan="2" class="col3"><input type="submit" value="  登录  " />  </td>

</tr>
<tr> <td colspan="2" >{%if msg%} <span>{{msg}}</span>{%endif%}</td></tr>
</table>
</form>
</div>
</body>
</html>
配置模板路径
修改网站项目的settings.py文件,配置模板路径。
ROOT_URLCONF = 'onLinePythonLearning.urls'

TEMPLATES = [
    {
        'BACKEND': 'django.template.backends.django.DjangoTemplates',
        'DIRS': ['templates'],
        'APP_DIRS': True,
        'OPTIONS': {
            'context_processors': [
                'django.template.context_processors.debug',
                'django.template.context_processors.request',
                'django.contrib.auth.context_processors.auth',
                'django.contrib.messages.context_processors.messages',
            ],
        },
    },
]
修改view文件
修改questions应用的views.py文件,实现用户登录。
修改questions.py应用的views.py文件,使得用户登录之后才能访问check,如果尚未登录就自动跳转到登录页面。
from django.shortcuts import render,redirect
from django.http import HttpResponse
from .models import Question2
from django.contrib import auth
from django.contrib.auth.decorators import login_required

# Create your views here.
@login_required(login_url='login/')
#修饰器,要求用户必须登录才能访问
#如果用户未登录,自动跳转到指定的登陆页面

def index(request):
    htmlCode ='<table border="1px">'
    for row in Question2.objects.all():
        htmlCode +=('<tr><td>'+str(row.id)+'</td><td>'+
                    row.questionContent+'</td><td>A. '+
                    row.option_a+'</td><td>B. '+
                    row.option_b+'</td><td>C. '+
                    row.option_c+'</td><td>D. '+
                    row.option_d+'</td>')
    htmlCode +='</table>'
    return HttpResponse(htmlCode)

def login(request):
    try:
        userName = request.POST['usr']#获取网页参数
        userPwd  = request.POST['pwd']
        user = auth.authenticate(username=userName,password=userPwd)
        #验证用户名和密码
        if user is not None:
            auth.login(request,user)#登录
            return redirect('/check/')#页面跳转
        else:
            return render(request,'login.html',{'msg':'用户名或密码不正确'})
    except:
        return render(request,'login.html',{'msg':None})
修改路由
修改questions应用的urls.py文件,增加login路由。
from django.urls import path
from . import views

urlpatterns = [
        path('',views.index),
        path('login/',views.login),
        ]
测试,运行网站
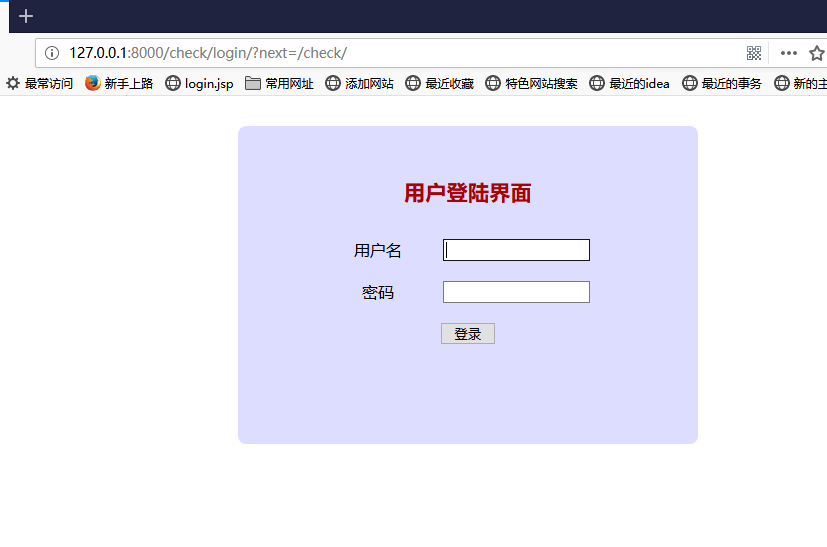
执行命令python manage.py runserver运行网站,使用浏览器打开http://127.0.0.1:8000/check,此时尚未登录,自动跳转到登录页面。
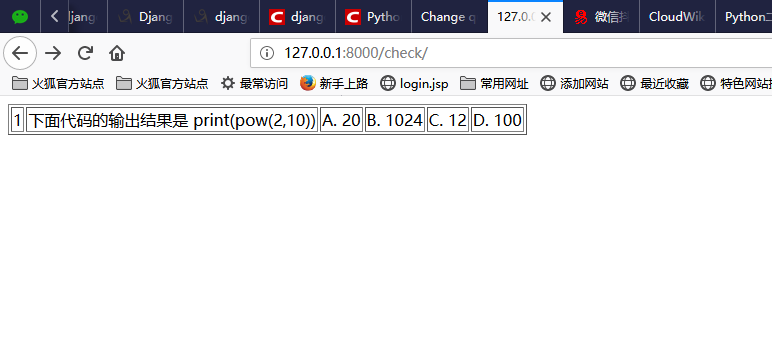
输入正确的用户名和密码,单击登录按钮,跳转至http://127.0.0.1:8000/check页面并显示数据。

